https://boda.su/en/posts/id57-safe-outlet-and-switch-replacement-guide-for-beginners
Safe Outlet and Switch Replacement Guide for Beginners
How to Replace an Outlet or Light Switch Safely at Home
Safe Outlet and Switch Replacement Guide for Beginners
Step-by-step guide to replacing an outlet or light switch safely. Learn essential tools, safety tips, and installation steps for a simple DIY home project.
2025-08-23T12:41:29+03:00
2025-08-23T12:41:29+03:00
2025-08-25T11:07:36+03:00
Swapping out an old outlet or switch is one of those household tasks that many people can manage on their own. The key is to follow safety rules closely and take each step carefully. Below is a simple guide that walks you through the process from preparation to testing, so you can handle the job without unnecessary stress.
Preparing Your Tools
Before you begin, gather everything you’ll need. Having the right tools on hand makes the job quicker and safer. The list is straightforward:
Flathead and Phillips screwdrivers
A voltage tester or indicator screwdriver
Pliers or wire cutters
A utility knife or wire stripper
A new outlet or switch
Electrical tape (for backup)
For beginners, replacing an existing outlet or switch is easier than installing one from scratch, which usually requires more experience.
Safety Comes First
The very first step is cutting off the power. Locate the correct circuit breaker for the room you’re working in and switch it off. To be absolutely sure the electricity is off, check the wires with a voltage tester. If the tester doesn’t light up, it’s safe to continue.
Removing the Old Device
Start by taking off the faceplate that covers the outlet or switch. These plates are typically held in place by clips or small screws. Next, unscrew the mounting hardware and gently pull the device out of the wall box.
Even though the power is off, avoid touching exposed wires directly. Detach the wires carefully and take note of their positions. A quick photo with your phone can help you remember where each wire goes when connecting the new unit.
Installing the New Outlet or Switch
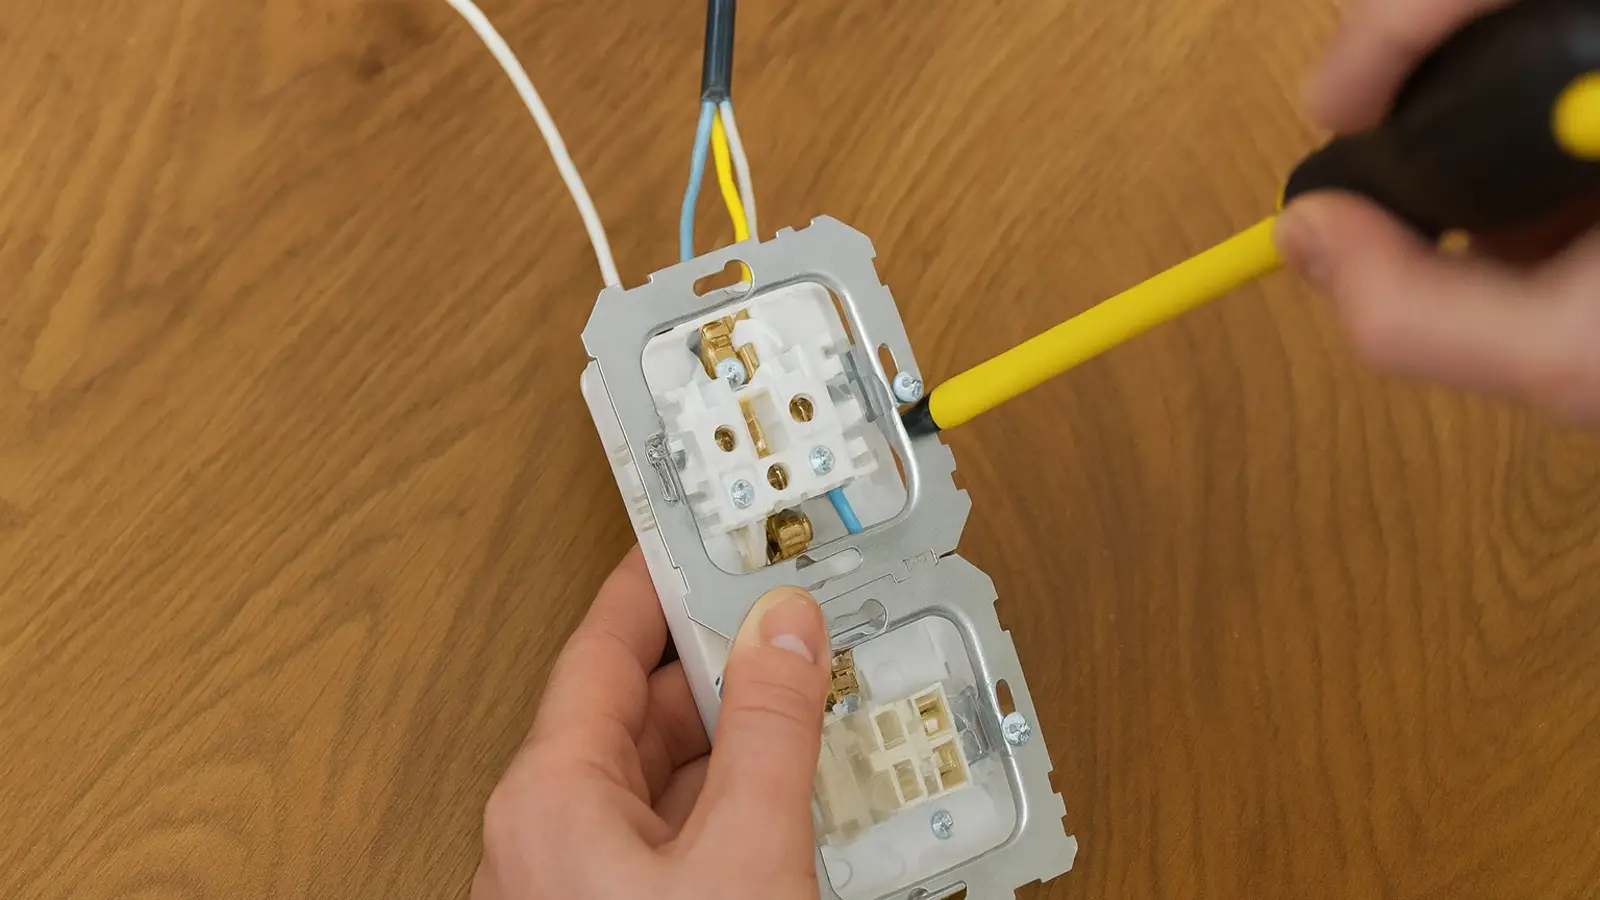
Before reconnecting, strip about 10–12 mm of insulation from the wire ends if needed. Inside the device, the terminals are usually marked: »L” for live (commonly black or brown), »N” for neutral (blue), and the ground symbol for the yellow-green wire.
Attach each wire to the corresponding terminal and tighten the screws so the connections are secure. Gently place the device back into the wall box, align it properly, and fasten it with screws. Finish by snapping or screwing the cover plate back in place.
Testing the Installation
Once everything is secure, restore power at the breaker. Then test your work: flip the switch to check the light, or plug in a small appliance to ensure the outlet is functioning properly.
Important Reminders
Patience and precision go a long way when dealing with electricity. If you spot damaged wires or feel uncertain at any step, it’s better to call a professional. Also, avoid performing this kind of work in damp areas unless you have additional protective equipment designed for wet environments.
Replacing an outlet or switch is a task within reach for most homeowners. With basic tools, careful handling, and attention to safety, it can be done smoothly and with confidence.
Outlet Replacement, Switch Replacement, Electrical Safety, DIY Electrical Work, Home Repair, How to Replace Outlet, How to Replace Switch, Beginner Electrical Guide
2025
articles
How to Replace an Outlet or Light Switch Safely at Home
Step-by-step guide to replacing an outlet or light switch safely. Learn essential tools, safety tips, and installation steps for a simple DIY home project.
Generated by Dall-e
Swapping out an old outlet or switch is one of those household tasks that many people can manage on their own. The key is to follow safety rules closely and take each step carefully. Below is a simple guide that walks you through the process from preparation to testing, so you can handle the job without unnecessary stress.
Preparing Your Tools
Before you begin, gather everything you’ll need. Having the right tools on hand makes the job quicker and safer. The list is straightforward:
- Flathead and Phillips screwdrivers
- A voltage tester or indicator screwdriver
- Pliers or wire cutters
- A utility knife or wire stripper
- A new outlet or switch
- Electrical tape (for backup)
For beginners, replacing an existing outlet or switch is easier than installing one from scratch, which usually requires more experience.
Safety Comes First
The very first step is cutting off the power. Locate the correct circuit breaker for the room you’re working in and switch it off. To be absolutely sure the electricity is off, check the wires with a voltage tester. If the tester doesn’t light up, it’s safe to continue.
Removing the Old Device
Start by taking off the faceplate that covers the outlet or switch. These plates are typically held in place by clips or small screws. Next, unscrew the mounting hardware and gently pull the device out of the wall box.
Even though the power is off, avoid touching exposed wires directly. Detach the wires carefully and take note of their positions. A quick photo with your phone can help you remember where each wire goes when connecting the new unit.
Installing the New Outlet or Switch
Before reconnecting, strip about 10–12 mm of insulation from the wire ends if needed. Inside the device, the terminals are usually marked: “L” for live (commonly black or brown), “N” for neutral (blue), and the ground symbol for the yellow-green wire.
Attach each wire to the corresponding terminal and tighten the screws so the connections are secure. Gently place the device back into the wall box, align it properly, and fasten it with screws. Finish by snapping or screwing the cover plate back in place.
Testing the Installation
Once everything is secure, restore power at the breaker. Then test your work: flip the switch to check the light, or plug in a small appliance to ensure the outlet is functioning properly.
Important Reminders
Patience and precision go a long way when dealing with electricity. If you spot damaged wires or feel uncertain at any step, it’s better to call a professional. Also, avoid performing this kind of work in damp areas unless you have additional protective equipment designed for wet environments.
Replacing an outlet or switch is a task within reach for most homeowners. With basic tools, careful handling, and attention to safety, it can be done smoothly and with confidence.